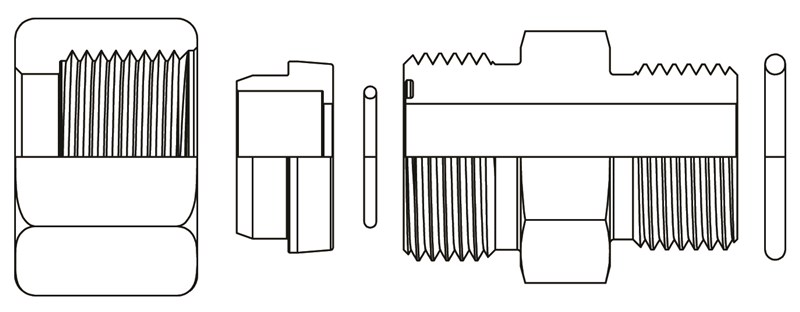
4000 Series “O” Ring Face Seal Fittings consist of four main components: Bodies, “O” Rings, Nuts, and Sleeves.
Bodies – Straight bodies are machined from bar stock. Shape fittings (elbows, tees, & crosses) are made from forgings.
“O” Rings – Buna-N, 90 Durometer
Nuts – “O” Ring Face Seal Tube Nuts in sizes 1/4”, 3/8”, 1/2”, 3/4”, 5/8”, and 1” are Cold Formed in 1010 steel. “O” Ring Face Seal Tube Nuts in sizes 1-1/4”, 1-1/2”, & 2” are hot forged from 1045.
Sleeves – “O” Ring Face Seal Sleeves are machined from
12L14 bar stock.
For use with most high pressure applications. Applications containing continuous mechanical shock.
Working pressures up to 6000 PSI – depending on tube and fitting size. (For applications using extreme pressures at 5000 PSI or above, contact World Wide Fittings.)
Steel – 12L14, 1045.
“O” Ring – Buna-N 90 Durometer, Viton.
Clear Zinc Trivalent.
-30° F to 275° F (Viton “O” Rings available upon request for high temperature
applications. Contact World Wide Fittings for details.)
Tubing sizes are measured in sixteenths of an inch. When ordering, the tube end of the fitting must be specified first followed by the pipe thread or straight thread end. All fittings in this section are ordered as bodies only unless specified by customers when ordering. (Contact World Wide when ordering fittings as assemblies or
configurations which are non-standard.)
4000 Series fittings meet SAE J1453 Specifications.
- Measure the needed length of tubing to be cut. When measuring be sure to leave room at the end of your tube for the sleeve which will be brazed on to the end of the tubing.
- Cut the length of tubing making sure the ends of the tubes are square. Remove all burrs and foreign matter from the ends of the tubing where brazing is to be done.
- Clamp the tube to be brazed in a vise and slide the tube nut on to the tube with the open end of the nut facing the tube end. Apply flux to the outside of the tube end. When applying flux to the tail end of the sleeve, be sure to coat the OD, ID, & braze ring.
- Slide the sleeve with the brazing ring on to the tube end and apply heat uniformly around the sleeve and the tube end. As the flux reaches the proper brazing temperature it will become clear in color. When the proper brazing temperature is maintained the braze ring will melt and the sleeve will settle down on the end of the tube. Should the sleeve not settle on to the tube apply a slight pressure to the sleeve to force the sleeve down onto the tube.
- After the tube cools, remove the assembly from the vise and inspect the braze joint. The braze material should have formed a continuous fillet completely around the tube. Should visible gaps be noticeable, the braze joint may not be complete and would fail if put into service. Re-brazing is recommended to correct the problem.
- Remove any excess flux & residue from the brazed assembly.
- Install the “O” Ring Face Seal fitting body to the piece of equipment. Line the ends of your tube assembly up with the fitting bodies. Visually inspect the ends of the fitting bodies to make sure the “O” Ring seals are in place. Bring the nut at each end up to the fitting body and tighten to the finger-tight position. Using a torque wrench, tighten the Face Seal tube nuts to the proper torque. (Refer to the assembly torque charts during installation of 4000 series fittings from the port and thread assemblies section.)
______________________________________________________
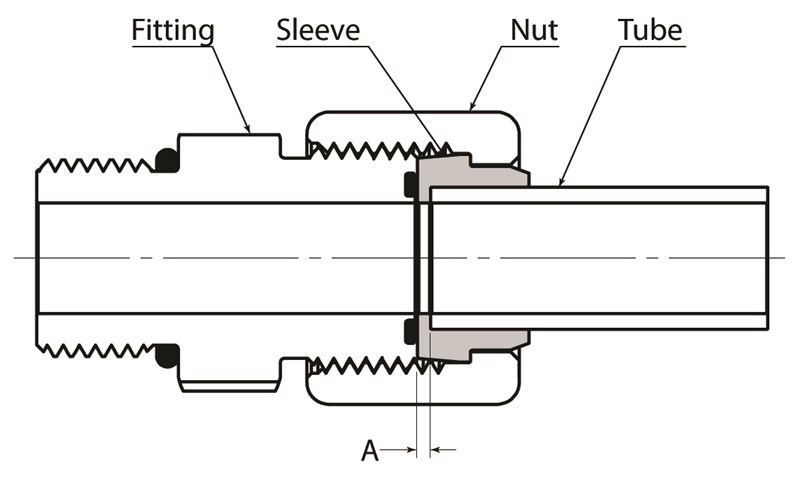
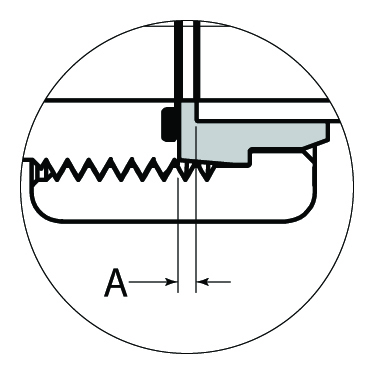
Correct Assembly
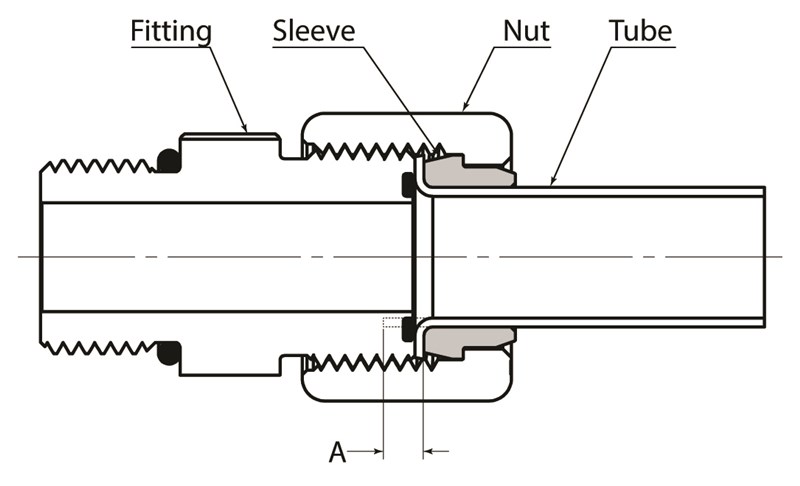
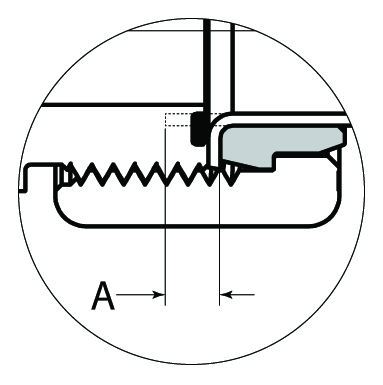
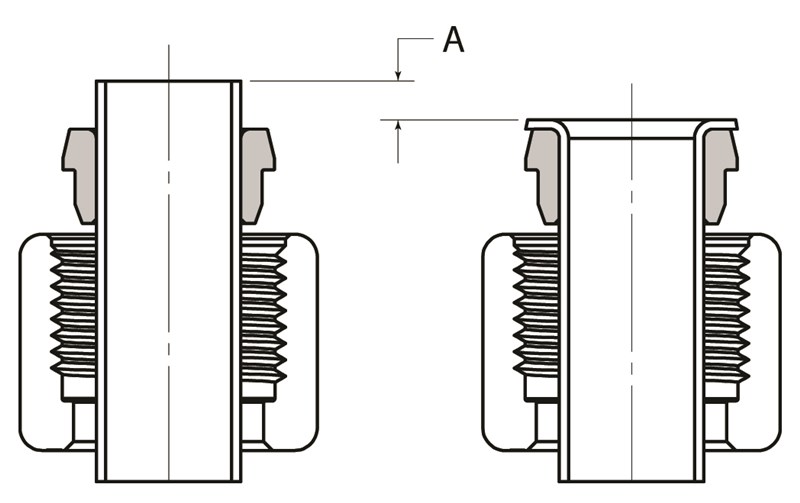
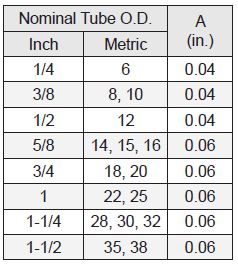
Tube Length Allowance (See Below Chart for extra cut-off length)
Incorrect Assembly
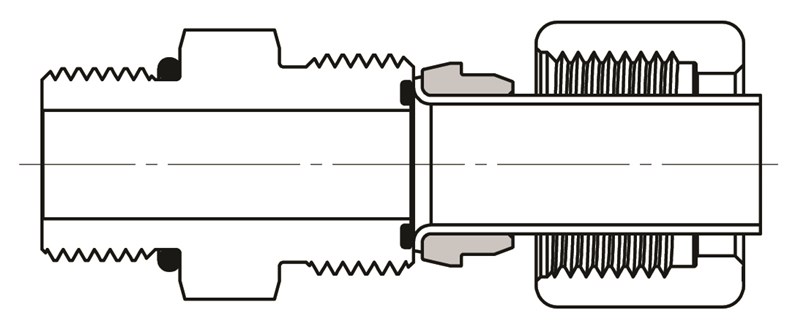
Underflanged Assembly
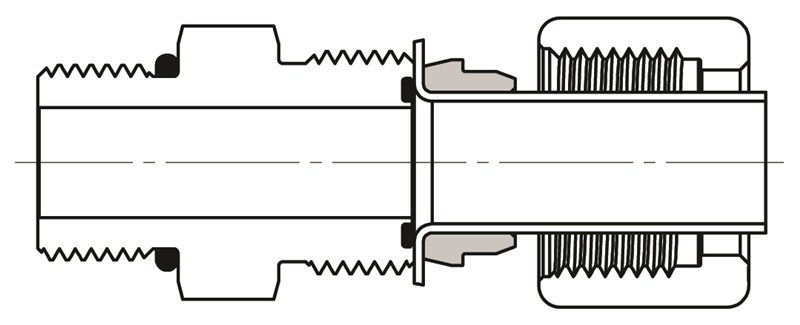
Overflanged Assembly
_____________________________________________________________
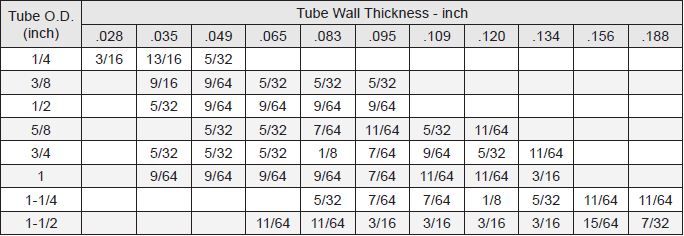
Extra tube cut-off length guide for inch tube
